
II. Indications
III. Advantages
- Much less expensive than MRI
- Much better tolerated than MRI
- High accuracy compared with MRI for larger Rotator Cuff Tear diagnosis
IV. Disadvantages
- Does not assess other Shoulder structures (e.g. Shoulder labrum)
- Not yet widely accepted for Rotator Cuff evaluation
V. Efficacy
- Accuracy is dependent on technician experience
- As good or greater accuracy than MRI for large partial and full thickness Rotator Cuff Tears (MRA is most accurate)
- Test Sensitivity: 67% for partial thickness and 97% for full thickness tears
- Test Specificity: >93%
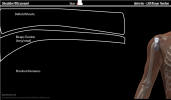
VI. Images


VII. Preparation
-
Ultrasound Probe
- High frequency linear probe
- Patient position: Sitting
- Patient sits with arm flexed at elbow, resting at side
- Wrist supinated (palm up, thumb laterally)
- Patient sits facing the Ultrasound screen
- Examiner stands facing the Ultrasound screen, behind the patient
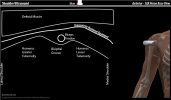
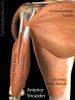
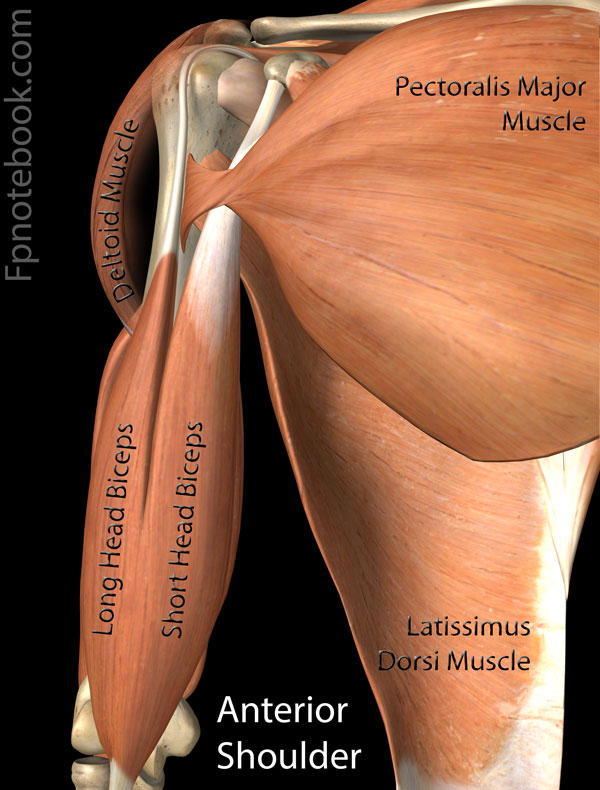
VIII. Technique: Anterior Humerus - Bicipital tendon (home position and external rotation)
- View 1: Anterior Humerus - transverse probe or 9:00 (home view, short axis or SAX for bicipital tendon)
- Humerus greater tuberosity
- Subscapularis insertion attaches here
- Bicipital groove (lateral)
- Contains Bicipital tendon (hyperechoic)
- Transverse ligament crosses over the groove and offers meager support to hold the biceps tendon in place
- Shallow groove <3mm may predispose bicipital tendon to sublux from groove
- Bicipital groove also contains anterior circumflex artery
- Follow bicipital tendon inferiorly or distally down the anterior Humerus in short axis
- Ultimately disappears at pectoralis major insertion
- Humerus lesser tuberosity (medial)
- View 2: External Rotation
- Observe biceps tendon in SAX while externally rotating arm
- Biceps tendon may sublux with external rotation or may be persistently dislocated medially
- View 2: Anterior Humerus - longitudinal probe or 12:00 (long axis or LAX for bicipital tendon)
- Follow bicipital tendon down the anterior Humerus in long axis
IX. Technique: Anterior Humerus - Subscapularis (external rotation)
- Positioning
- Arm in external rotation and slight abduction
- Contrast with arm at rest position (as above) which demonstrates bicipital tendon
- View 1: Anterior Humerus - transverse probe or 9:00 (long axis or LAX for subscapularis)
- View 2: Anterior Humerus - Longitudinal probe or 12:00 (short axis or SAX for subscapularis)
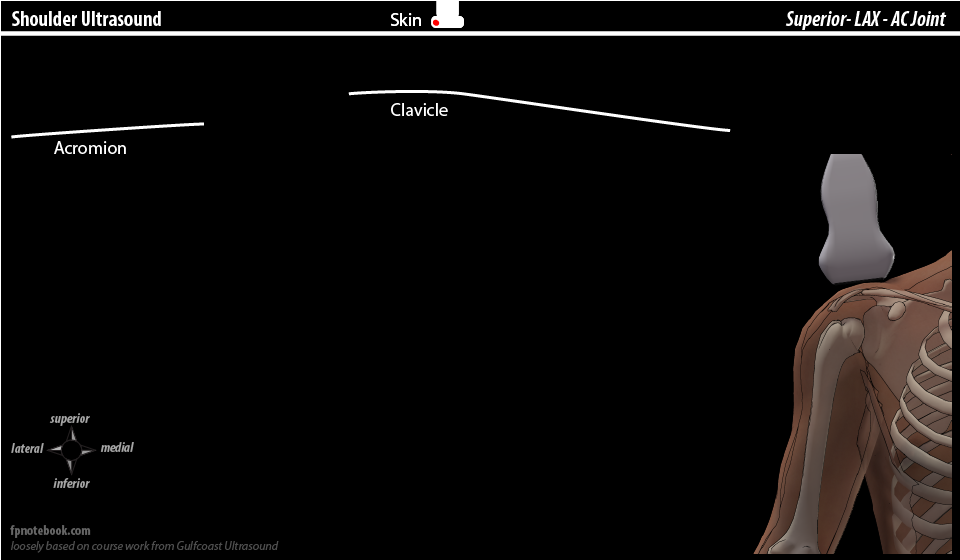
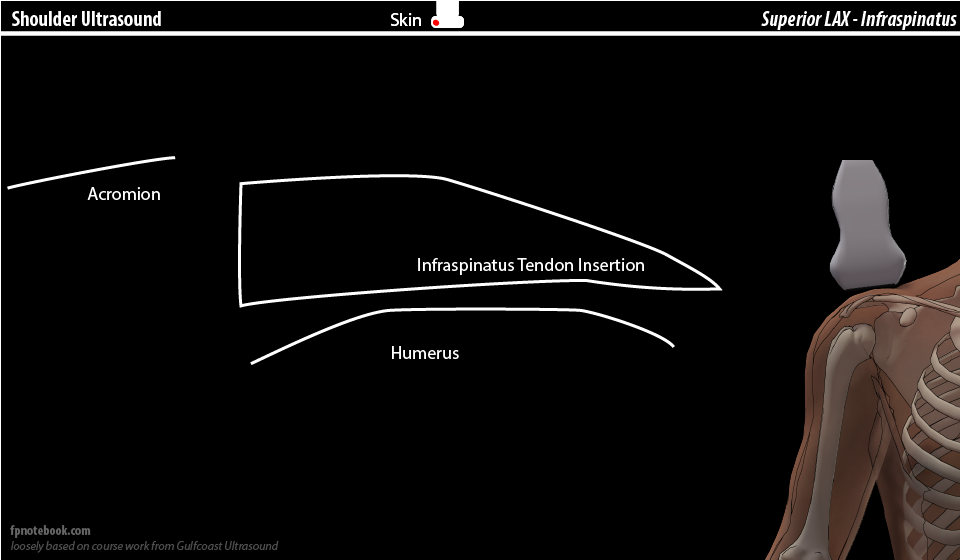
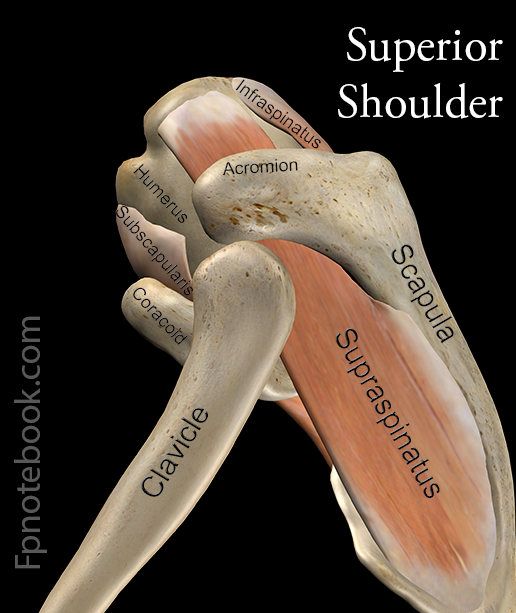
X. Technique: Superior Humerus - AC Joint and Supraspinatus (arm abduction)
- Images
- View 1: Superior Humerus - transverse probe or 9:00 directed down to AC (long axis or LAX for AC Joint)
- Clavicle
- AC Joint
- Observe for osteophytes and defects
- Subacromial space
- Supraspinatus tendon may be be visualized descending under AC joint on Shoulder Abduction
- Supraspinatus tendon should be 6mm or less in width
- Observe tendon for "bunching up" or catching as it passes under AC Joint
- Acromion
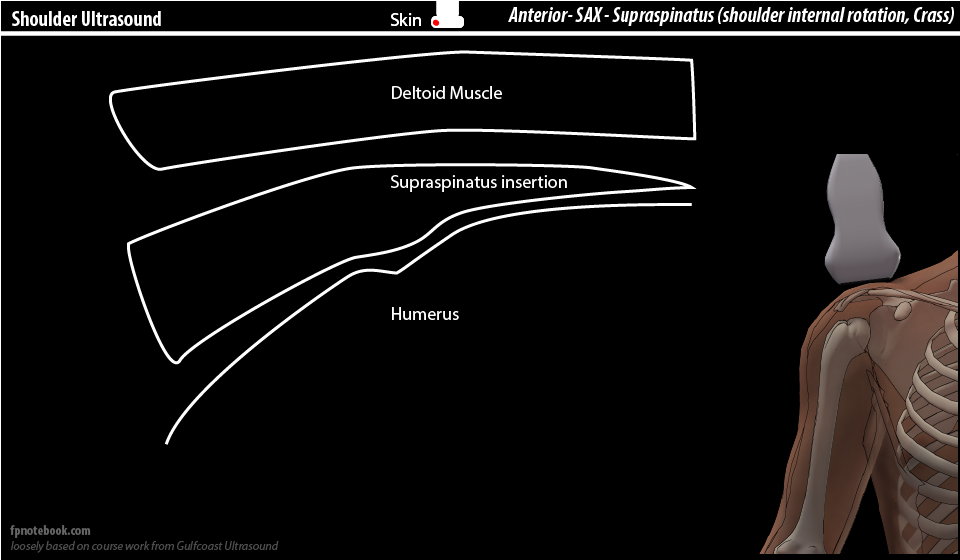
XI. Technique: Anterior Humerus - Supraspinatus (Crass Position)
- Positioning
- Arm internally rotated with hand resting across the low back (Crass Position)
- Modified Crass: Patients palm against their ipsilateral low back over iliac
- Probe position will require fine adjustment
- Arm internally rotated with hand resting across the low back (Crass Position)
- View 1: Anterior Humerus - 10:00 to 11:00 (long axis or LAX for supraspinatus)
- Supraspinatus insertion at Humerus has a characteristic appearance
- Inserts into a flat slope (foot print) at the top of the Humerus (superior facet)
- Insertion region (within 1 cm) accounts for 90% of Rotator Cuff pathology
- Any observed defect should be confirmed in 2 views and by adjusting the probe (rotation, tilt, heel-toe)
- Defects will be articular sided (deep), intrasubstance or bursa sided (superficial)
- View 2: Anterior Humerus - 8:00 (short axis or SAX for supraspinatus)
XII. Technique: Anterior Humerus - Rotator Cuff Interval
- Positioning
- Arm internally rotated with hand resting across the low back (Crass Position)
- View 1: Anterior Humerus - Transverse Probe or 9:00 (bicipital groove)
- Subscapularis insertion
- Most medial
- Bicipital groove (between the subscapularis and the supraspinatus, 3 structures)
- Bicipital tendon (long head)
- Coracohumeral ligament
- Superior glenohumeral ligament
- Supraspinatus insertion
- Inserts at superior facet of greater tuberosity
- Also shares one third of middle facet with infraspinatus
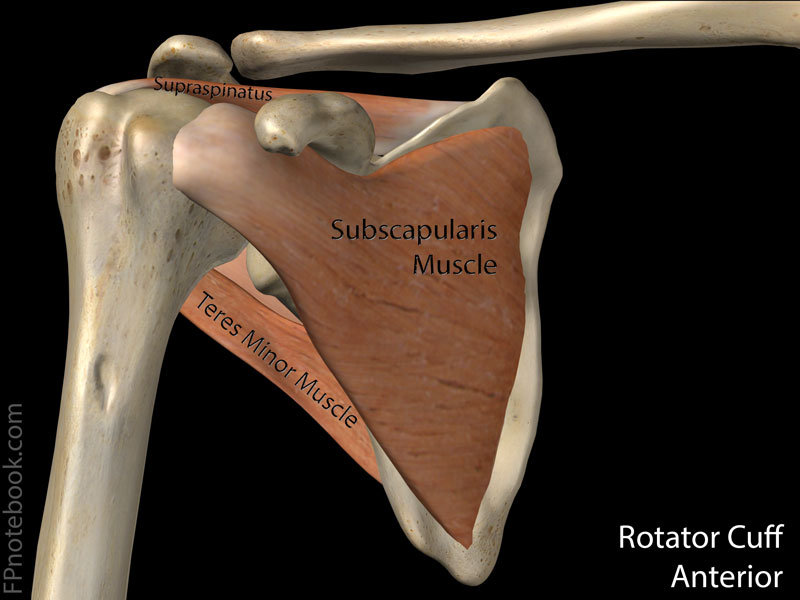
- Infraspinatus insertion
- Inserts at middle facet of greater tuberosity
- Teres Minor (rarely Clinically Significant)
- Inserts at inferior facet
- Subscapularis insertion
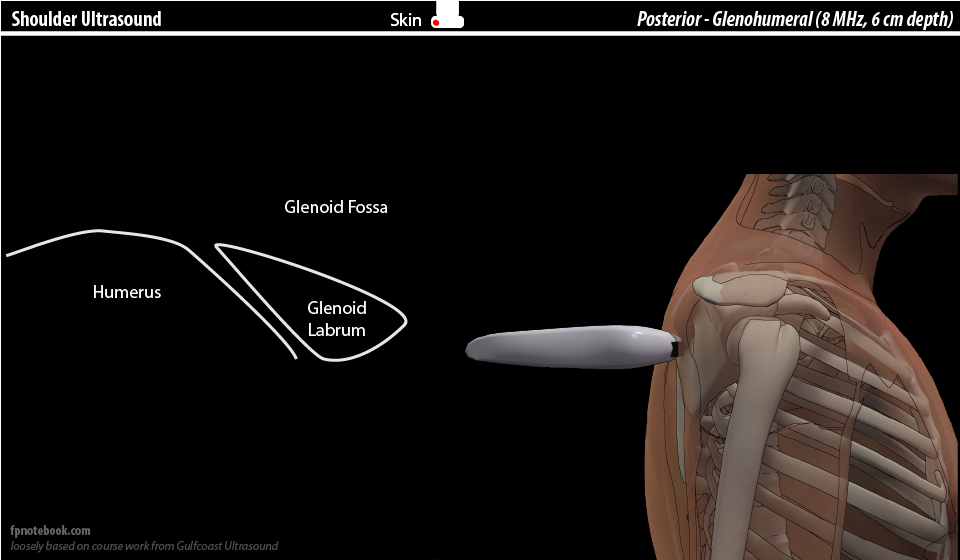
XIII. Technique: Posterior Shoulder (posterior Glenohumeral Joint)
- Positioning
- Patient positions arm across their chest or in their lap
- View 1: Transverse probe (long axis for infraspinatus)
- View 2: Supraspinatus Impingement
- Using the same probe position as above
- Patient repositions their arm at side
- Supraspinatus is now visualized in the same position infraspinatus was in view 1
- Allows for dynamic testing for supraspinatus impingement
- Passively abduct (and extend the arm) while observing the supraspinatus move on Ultrasound
XIV. References
- Chappell (2016) Musculoskeletal Ultrasound Course, , Gulf Coast Ultrasound, St. Pete's Beach, FL
- Moore (2013) Upper Extremity Ultrasound Video, Gulf Coast Ultrasound
- Burbank (2008) Am Fam Physician 77:453-60 [PubMed]
- Dinnes (2003) Health Technol Assess 7:1-166 [PubMed]